Stomping around a convention all weekend in hefty iron boots sounded about as appealing as the water temple itself. With that in mind, the task of creating comfortable, light boots that could endure a weekend in a highly populated area was added to my quest log. This post will be picture heavy because visual aids are quite helpful in explaining these things, click on any pictures to enlarge them. First step, gathering supplies.
Supplies:
Brown boots
Pen
Paper
X-acto or similar
Ruler
Two pieces of craft foam (foamies, color doesn't matter) 12" x18"
Hot glue gun and glue
Wire (16 or 18 gauge picture wire)
Plasti-dip (black, spray)
Rub-n-buff (silver)
A sock (doesn't have to be new)
Velcro (1" squares)
Tip: Use craft store coupons to your advantage. Michaels, Joann’s and Hobby Lobby all have weekly coupons of usually 40% off one item.
New game? ►Yes No
Begin by drawing a line along one edge of the paper with your ruler about the size you want the side of the iron on the boot to be, I made mine an inch. At the center of this line, draw a shape similar to a plateau with rounded edges. For a better grasp on the shape, I provided a picture below. Cut the design out and hold it up to the back of your boot to get a feel for the size. If needed, repeat with adjustments until you’re happy.
 Then, trace the paper design onto the craft foam in the center of the longest side of foam. Cut the design out and instead of cutting at the edge of the paper pattern, cut all the way to the edges of the foam to create lengthier strips along the sides. This will make it easier to size after you get them on the boots.
Now, take the wire and bend it to roughly sit about ¼” to ½” inside the edge of the plateau shape. Trim the wire to fit, then use a considerable amount of hot glue gun to secure the wire in place. Be careful, the wire will become hot to the touch the longer there is heat applied to it.
After letting it cool, you will be able to bend the wire to shape the foam piece to sit around the back of the boot. Don’t worry about the sides for now. Let’s move on to the front piece.
 Using paper again. Draw out the shape of an eye, oval-like with points. (I believe the shape is called a 'lens'.) Make one arch larger than the other. Like with the back piece, cut it out, check the size against the boot that you'll be wearing. Once you're happy with the size, transfer it to foam and cut it out.
As you did with middle of the back piece, shape and cut wire to fit along the larger arch, and glue it down. This is a great time to label each side for the coordinating boot. After drying, shape it to fit over the toe of the boot. Leave a gap between the bottom of the foam and where the boot sits on the ground. Preventing the foam from actually touching the ground adds durability.
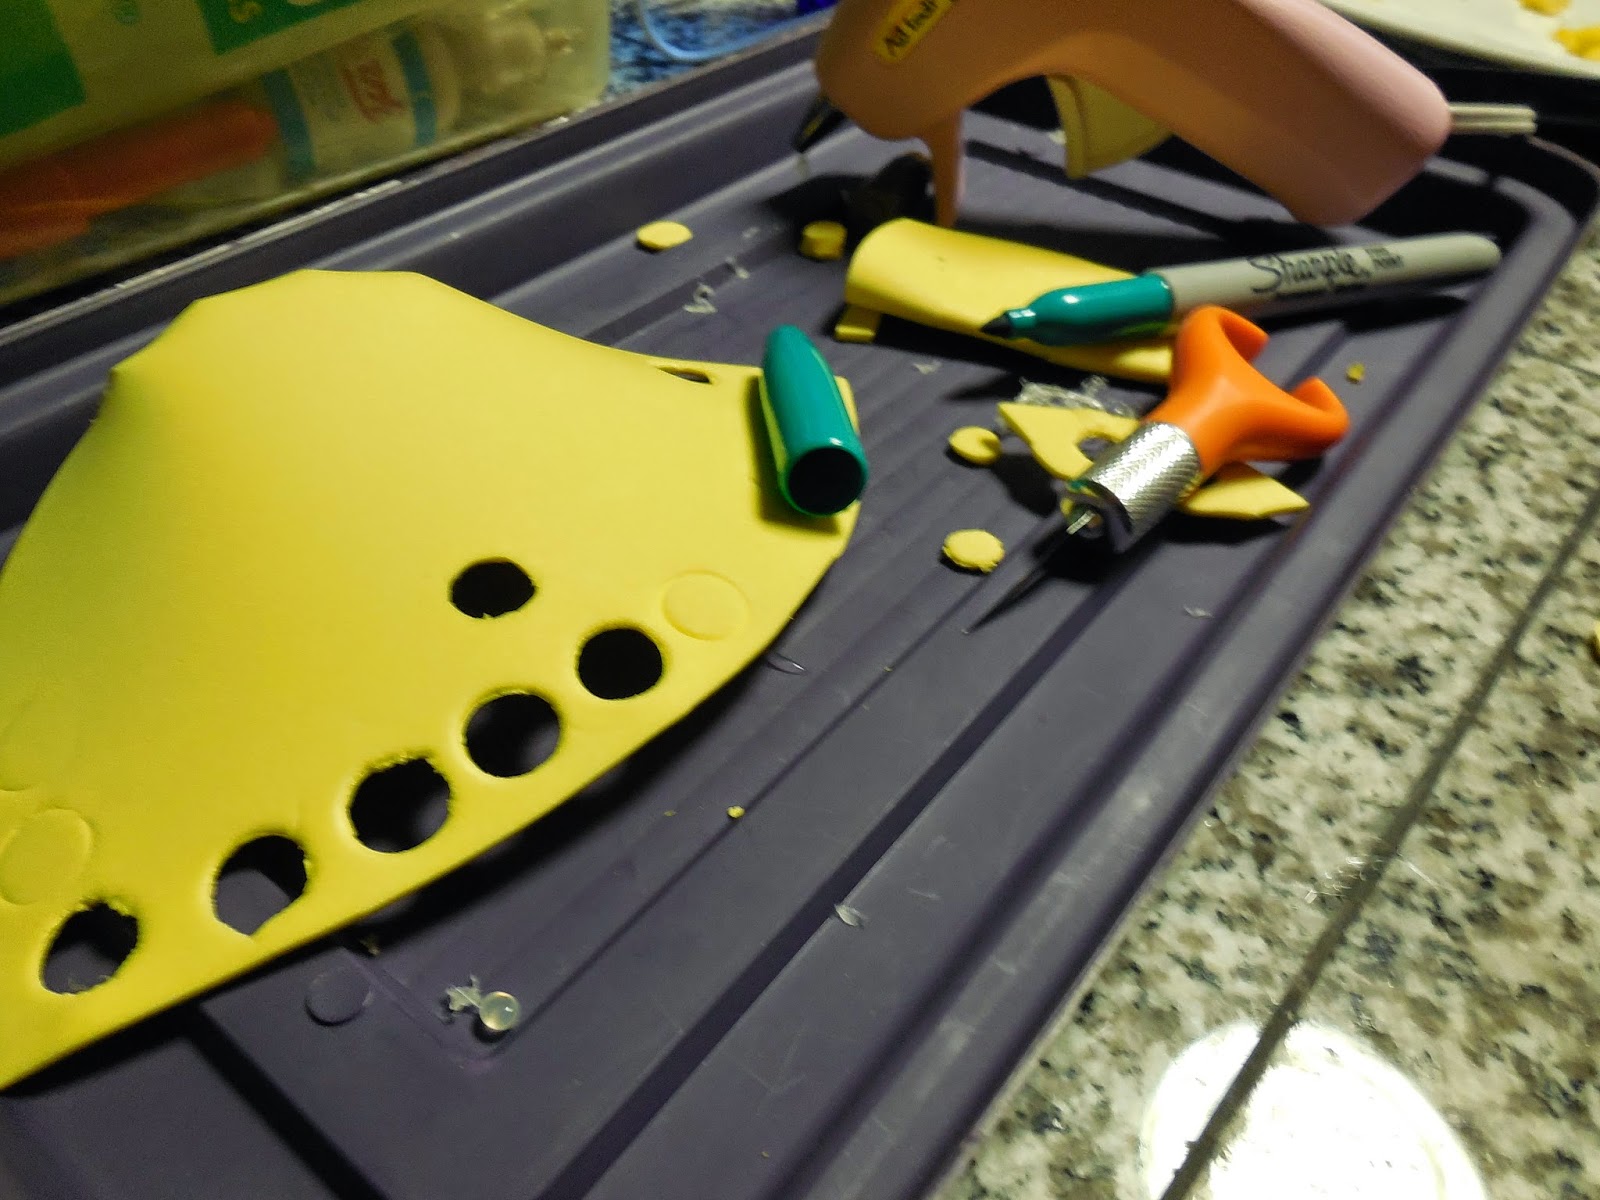
Creating the rivets seemed like quite a daunting task at first. How many tiny circles did I have to make relatively the same size? Fear not! I found that using the lid of a sharpie pressed down on a hard surface with craft foam in between and a little twisting back and forth did the trick!
After cutting a few out, place them along the foam pieces while they sit on your boots. Try different spacing to figure out the desired look. I ended up needing around thirty pieces for my boots. This will vary by the size of your foot. Place dots along the foam pieces where you wish to place your rivets.
Finally, when you've cut out more circles than can fit in your inventory, get to gluing! Use your dots for reference and place a small sphere of glue in the center of each rivet. You'll have a split second before it hardens to move the rivet slightly if it needs a bit of adjustment.
Next, in a WELL VENTILATED AREA coat the pieces using the Plasti-dip spray, wait at least twenty to thirty minutes between coats. Be sure to coat as much surface area as you can, try not to coat too heavily. Many light coats are better than a couple heavy ones that get smudged. As each coat is applied, the foam will become less porous. In the picture below: On the left, after the first coat, still noticeable pores and spots that need covering. On the right, after the fifth coat the foam looks more uniform, very little visibility of pores and it will no longer absorb paint!
Now, how do you get that brand new iron look? Rub-n-buff! First! This is important! Decide one direction to paint back in forth in. Stay consistent. This helps give each piece a uniform look with the other. Don't be alarmed if one or two strokes goes awry, it happens, it's not the end of Hyrule.

Grab the Rub-n-buff, a piece of foam, the old sock, a paper plate or cardboard box (for excess, I used an old board). You'll need a sock that has this texture on the inside of it, instead of a brush this will be your painting tool.
Turn the sock inside out and place a dab of rub-n-buff on the sock and begin rubbing the excess off so there is more distribution among the sock's surface. Start moving the sock in the direction you chose and gently apply pressure to the foam. The lighter the better at the beginning. You want some of the black to show through the silver, don't try for full coverage. Don't worry about filling in to the very edge next to the rivets, a little extra darkness creates a shadow effect. Not to mention, you don't want your rivets falling off because you're brushing over or on them too hard. Some imperfection adds a gritty and real feel, so never worry about that.
Let your iron dry! I live in a warm, dry place, so mine dries faster than you can say HYAAAAAH! Though, it won't take long. After it's dry to the touch, you can get to attaching them to the boots!
You'll need six squares of velcro and a pair of scissors. Cut two squares in half, these will be used for the sides. Reminder, you don't want your foam touching the floor, you want it to float slightly. Peel the backing off of both pieces and apply the stiff (non-fuzzy) side to the boot. Take the foam piece that fits over the toe and press it on, hold it there for a moment. Do the same with the center of the back piece along the back of the boot. Repeat with the halves, one for each side. Place these towards the front of the boot, but layer them underneath the toe portion.
To remove a piece, reach under the foam and carefully pull the velcro that is attached to the foam away from the other. Do not just rip or pull it. I was as anxious about how durable this approach would be as I was the first time I faced Ganondorf. Occasionally, another convention attendee would bump my boot and I'd hear the tearing of velcro. My heart sank at the sound of what I assumed was my failure; however, they remained intact! Instead of ripping the foam, the velcro had enough surface area to hold on yet move around. By the glory of Nayru, Din and Farore these boots lasted me all weekend!
Here are a few pictures of the completed boots! Also, a shameless picture of my cosplay in it's entirety. If you want to make these or are attempting to and you have any questions, feel free to ask me! Comment, send me a facebook message or an email, I'm more than happy to help.